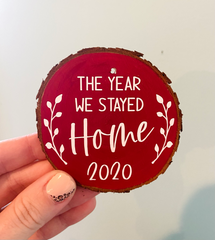
Make A DIY Farmhouse Christmas Ornament With Your Cricut!

The links contained in this blog post may be affiliate links. I may receive a small commission for the referral but there is no additional cost to you.
For this DIY Christmas Ornament gather the following items
- Ornament Blank of your choice. I used these Wood Slice Ornaments for the rustic farmhouse look.

- Craft paint and brush of your choice
- Heat Transfer Vinyl - I used White Siser Easyweed
- Vinyl Cutting Machine - I used my Cricut Explore Air
- Heat Press or Iron - I love my Cricut Easy Press Mini

- Ribbon of your choice
- Ornament SVG from Wispy Willow Designs (50% off at time of posting!)
Let's Get Started - Time to Paint!
I painted my wood round first. It doesn't take much paint and you can use any color. Mix and match for a fun effect!
Let it dry - I let mine dry overnight to make sure it was fully dry before I applied my vinyl.

Let's cut Vinyl!
I measured my ornament and sized my SVG to fit inside the circle in Cricut Design Space.

I used Siser HTV (scraps woohoo!) - Remember to mirror your design when cutting.

Then, weed your design. I have a handy dandy weeding pen from 143 Vinyl that makes this super duper quick.

Time to press!
Place your weeded design on your ornament blank. Look how pretty!

Next, cover it with a teflon sheet to protect the vinyl.
Then do a quick press with your heat press or iron. I used my Cricut Easy Press Mini on the medium setting. I pressed each area for about 10-15 seconds.

Slowly peel off the carrier sheet, press again if the carrier sheet does not come off quickly and easily.


And here it is finished! Added a ribbon (from a previous year's Target $1 Spot Find) Can't wait to decorate my tree!

Happy crafting! I'd love to see what you make in my Facebook Group.


Leave a comment